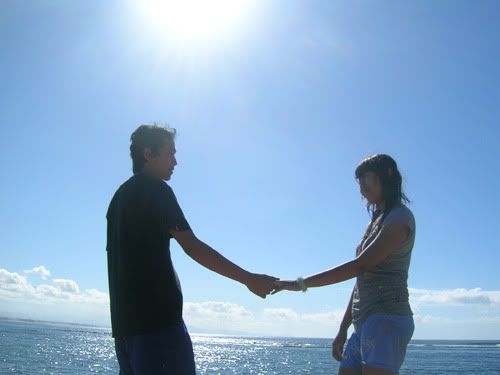
Sometimes when you taking a picture, especially on the ray of the light, you will get a over exposure image. But don't worry, I will tell you how to retouch it, and make it worth enough. Here is the photo that will be edited. Taken on Sanur Beach Bali, a few days ago. SO, let's begin...
 Open up the photo on Adobe Photoshop. Let's start from adjust the color of the photo. Go to the image menu, select adjustment, then click on auto color. In another way, you just can push the shift+ctrl+B as a shortcut. Now look at the photo, there's a change in the color. It's add a deep color to the photo.
 The next step is adding the curve adjustment. Just go to image, adjustment, and click curve. Now, a new curve's window is appear. To add great touch to the photo you need to position the curve like the picture below. Simply click the bottom part of the curve, drag it to the lower position, then click the upper part of the curve and make it to the upper position. Just the picture below as your reference
 Thaaaraaa...the photo is totally change. The people on the photo is going darker and the light was reduced. But it wasn't finish yet. Let's go with the finishing session. Click the burn tool and apply to the cloud above the sea. It will make the cloud look clearer. Be careful when applying the burn tool, your precision is the key. And don't forget to set the midtones on the lower level, so that you will not getting burned photo as much.
 The last finishing step is dodge tool. Apply over the sea to reduce the deep blue sea color. Just apply a little bit, may be one click and drag on the sea is enough. All you have to do is done...and you can see the result...quite romentic for a "prewedding" photo. See you on anothers tutorial.
 Open up the photo on Adobe Photoshop. Let's start from adjust the color of the photo. Go to the image menu, select adjustment, then click on auto color. In another way, you just can push the shift+ctrl+B as a shortcut. Now look at the photo, there's a change in the color. It's add a deep color to the photo.
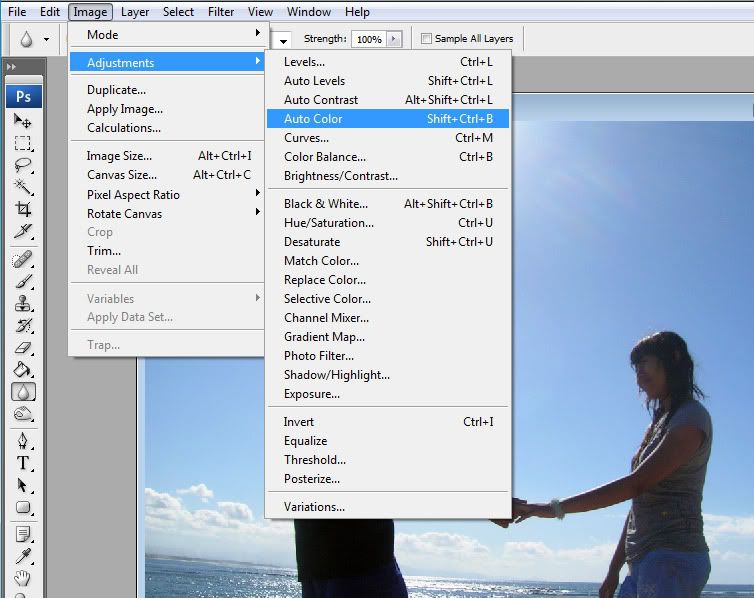 The next step is adding the curve adjustment. Just go to image, adjustment, and click curve. Now, a new curve's window is appear. To add great touch to the photo you need to position the curve like the picture below. Simply click the bottom part of the curve, drag it to the lower position, then click the upper part of the curve and make it to the upper position. Just the picture below as your reference
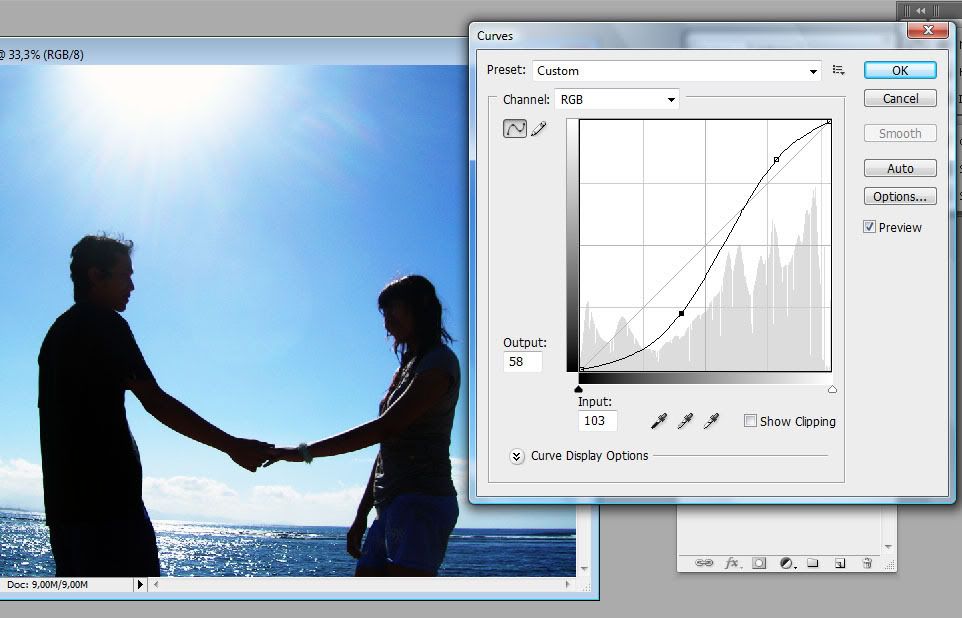 Thaaaraaa...the photo is totally change. The people on the photo is going darker and the light was reduced. But it wasn't finish yet. Let's go with the finishing session. Click the burn tool and apply to the cloud above the sea. It will make the cloud look clearer. Be careful when applying the burn tool, your precision is the key. And don't forget to set the midtones on the lower level, so that you will not getting burned photo as much.
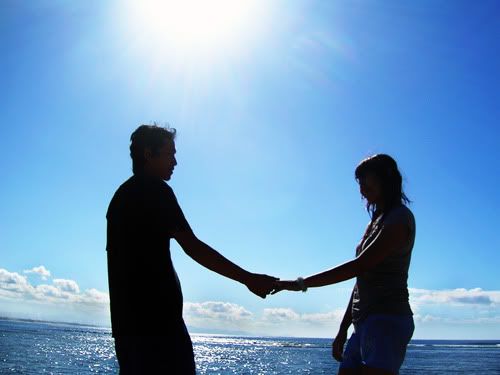 The last finishing step is dodge tool. Apply over the sea to reduce the deep blue sea color. Just apply a little bit, may be one click and drag on the sea is enough. All you have to do is done...and you can see the result...quite romentic for a "prewedding" photo. See you on anothers tutorial.
